Hello creators, How are you all? You might be wondering why we’re calling you creators.
Well, you are on the Alfaz Creation platform, where we consistently provide you with educational content on topics like how to create and many more.
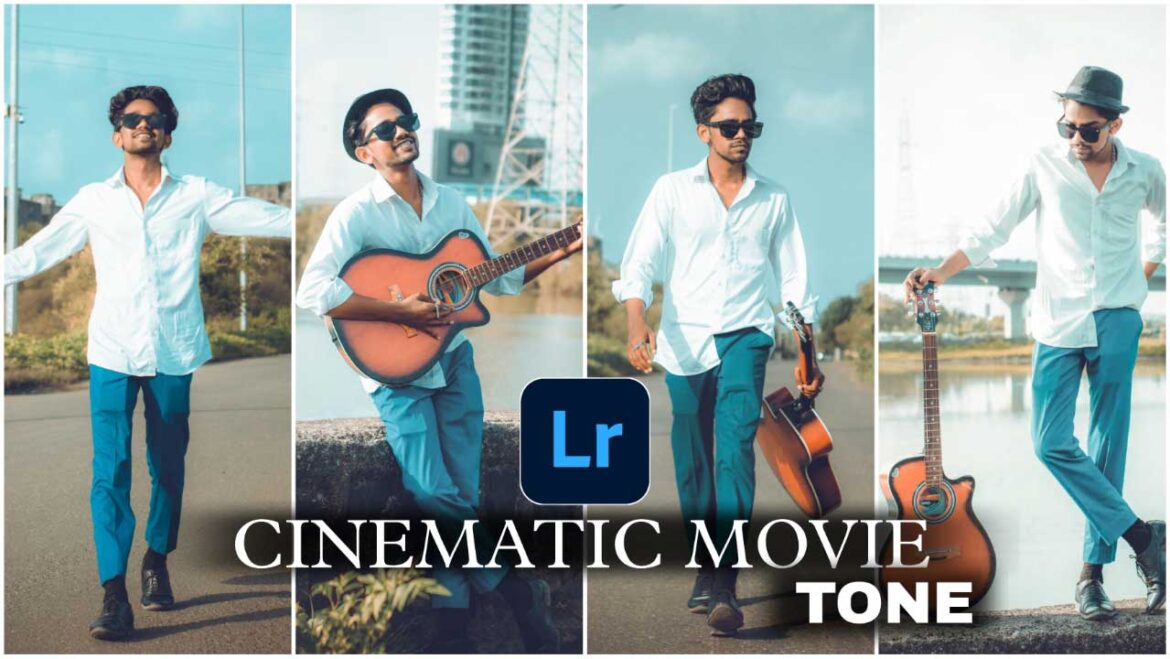
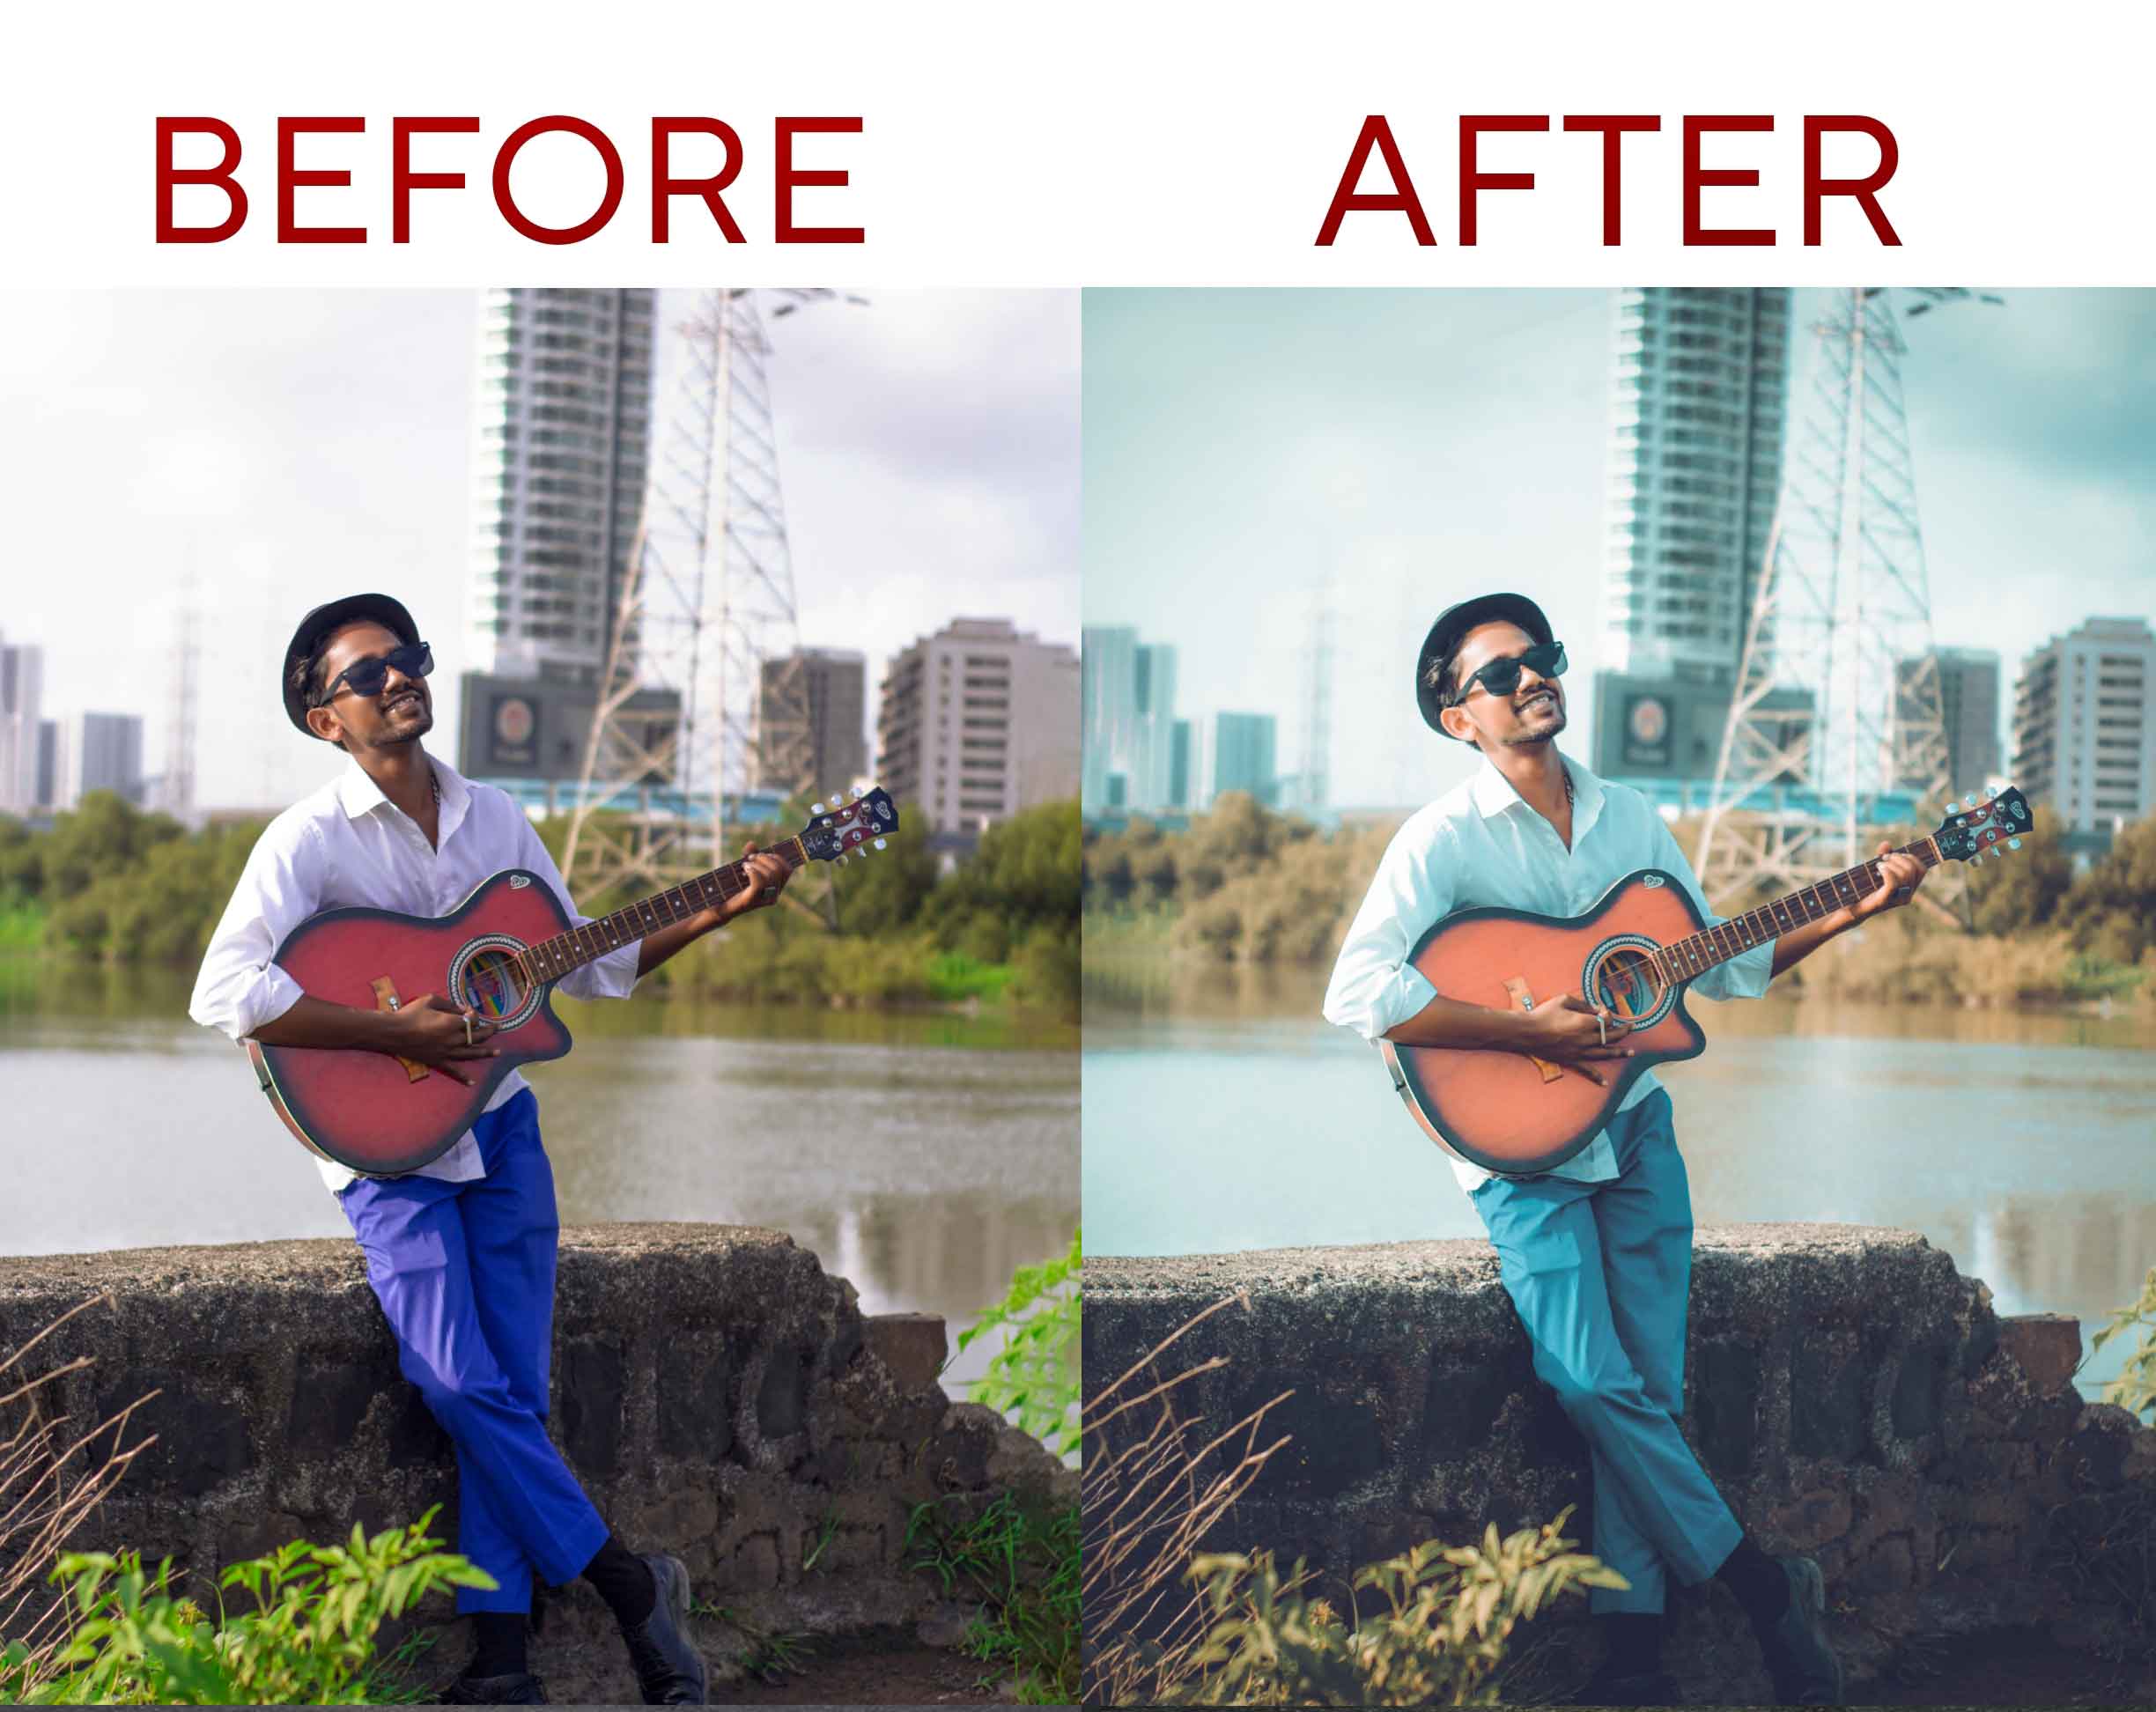
Did you know that many people are unaware of and don’t take Lightroom Presets seriously? However, they should because it’s the only essential thing that can make you happy in new and exciting ways.
How to add cinematic tones in photos?
You might have asked lots of questions about the same term on Google, YouTube, and elsewhere, but now it is being clarified through us because we share a lot of knowledgeable things with you.
Adding cinematic tones to photos can give them a dramatic and visually appealing look. To achieve this effect, you can use various photo editing software and follow these steps:
- Choose the Right Photo: Start by selecting a photo that has the potential to look cinematic. Look for images with good lighting, interesting compositions, and strong subjects.
- Crop and Straighten: Use cropping tools to adjust the composition if needed. Straighten the horizon and make sure the framing enhances the cinematic feel.
- Adjust Exposure: Manipulate the exposure settings to get the desired lighting effect. You can darken the shadows and slightly brighten the highlights to create a moody atmosphere.
- Color Correction: Cinematic photos often have specific color tones. You can achieve this by tweaking the color balance, saturation, and contrast. Try giving your photo a cooler (bluish) or warmer (orange/amber) tone, depending on the mood you want to convey.
- Apply Filters or Presets: Many photo editing apps and software offer cinematic presets or filters. Apply these to your photo as a starting point and then fine-tune the settings to suit your image. These presets can help you achieve the desired cinematic look quickly.
- Enhance Contrast: Increase the contrast slightly to make the details pop. Cinematic photos often have strong contrasts between light and dark areas.
- Adjust Curves: Work with the curves tool to fine-tune the tonal range. Create an S-shaped curve for more contrast and to add depth to your image.
- Vignette Effect: Add a subtle vignette effect to draw the viewer’s attention to the centre of the photo. This can create a cinematic focus.
- Texture and Sharpness: Enhance textures in your image to give it a more cinematic feel. You can use tools like clarity and sharpening to achieve this effect.
- Film Grain or Noise: To mimic the look of the film, add a touch of grain or noise. This can give your photo a vintage and cinematic vibe.
See More:- Lightroom Presets
Step By Step Apply:- Lightroom Cinematic Presets
Certainly! Here’s a step-by-step guide on how to apply cinematic presets in Adobe Lightroom:
Step 1: Open Adobe Lightroom
- Launch Adobe Lightroom on your computer. If you don’t have it installed, you can download and install it from Adobe’s website.
Step 2: Import Your Photos
- Click on the “Import” button in the Library module to import the photos you want to edit with cinematic presets. Select the photos from your computer and click “Import.”
Step 3: Navigate to the Develop Module
- In the Library module, select one of the imported photos you want to edit.
- Click on the “Develop” module at the top of the screen to enter the editing mode.
Step 4: Apply Cinematic Preset
- In the Develop module, you’ll find the “Presets” panel on the left side of the screen. If it’s not visible, you can show it by clicking the arrow next to the “Presets” tab.
- In the Presets panel, you can explore the built-in presets or any custom presets you’ve added.
- Click on the preset folder that contains the cinematic presets you want to use. This will expand the folder to reveal the available presets.
Step 5: Hover Over Presets
- Hover your mouse cursor over each preset within the folder to see a live preview of how it will affect your photo. This will help you choose the one that best suits your image.
Step 6: Click to Apply
- Click on the preset you want to apply to your photo. Lightroom will automatically apply the preset’s settings to your image.
Step 7: Fine-Tune Settings (Optional)
- After applying the preset, you may need to make additional adjustments to fine-tune the look. Use the various editing tools in the Develop module, such as exposure, contrast, saturation, and more, to achieve the desired result.
Step 8: Save Your Edited Photo
- Once you’re satisfied with the changes, go back to the Library module by clicking on the “Library” module at the top.
- Click on “File” and select “Export” to save your edited photo. Choose the file format, quality, and destination folder, then click “Export.”

Have More From Here:-